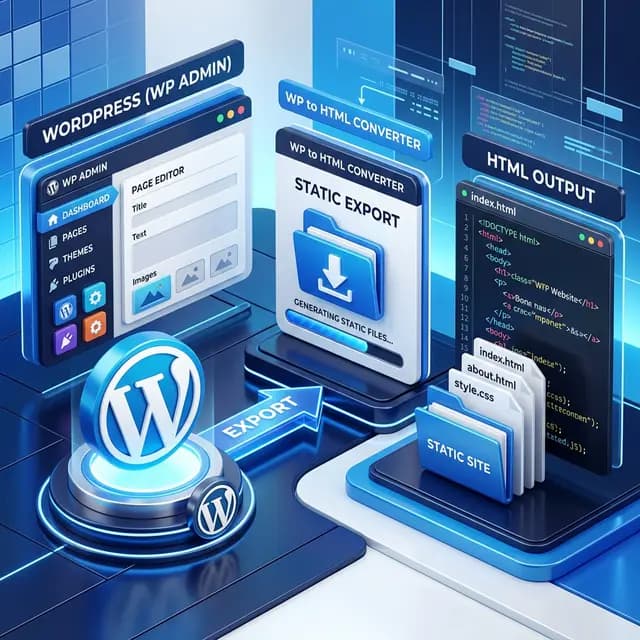
Converting WordPress to HTML gives you static files you can publish on a compatible host. It can suit a finished brochure site, portfolio, or archive that needs fewer content updates. The result depends on the pages captured, the resources they use, and how you replace interactive features.
This guide explains which export method to use, how to test the output, and how to plan URLs, redirects, and ongoing updates.
Conversion Strategy: When Static Makes Sense
Before converting, you need to understand what you gain and what you give up.
| Factor | WordPress (Dynamic) | Static HTML |
|---|---|---|
| Page delivery | May use PHP, database queries, and caching | Serves files; JavaScript and remote services still affect load time |
| Security work | Maintain WordPress, plugins, hosting, and access | Maintain dependencies, forms, hosting, and deployment access |
| Hosting cost and uptime | Depend on the host, plan, and workload | Depend on the host, plan, and workload; check free-tier terms |
| Content editing | WordPress admin panel | Edit the source and re-export, or edit the HTML |
| Dynamic features | WordPress can handle accounts, search, and checkout | Need separate services or a different architecture |
Good Candidates for Conversion
- Portfolio and brochure sites that rarely change
- Marketing landing pages with fixed content
- Archived blogs that will not receive new posts
- Event or campaign pages with a set end date
- Client deliverables that need to exist independently of a CMS
When to Stay on WordPress
Keep WordPress if you need frequent content updates with non-technical editors, WooCommerce for e-commerce, user authentication and memberships, database-driven dynamic features, or active comment sections.
For the public-URL workflow and available export options, use the WordPress to HTML converter.
Step-by-Step Conversion Workflow
Step 1: Audit Your WordPress Site
Before converting, inventory everything:
- Pages and posts. List every published URL. Use a sitemap plugin or crawler to generate a full list.
- Forms. Note every form on the site (contact forms, newsletter signups, quote requests). These will need alternative backends after conversion.
- Dynamic features. Identify any features that depend on PHP or the WordPress database (search, comments, user login, WooCommerce).
- Plugins with frontend output. Some plugins inject CSS, JavaScript, or HTML into your pages. Verify that the output is captured in the rendered HTML.
- Media files. Confirm that all images, videos, and downloadable files are accessible and properly linked.
Step 2: Choose the Right Export Method
WordPress Tools → Export: Move Content to WordPress
The native Tools → Export screen downloads WXR/XML content for import into another WordPress installation. Choose it for a WordPress-to-WordPress content move. It does not create a deployable HTML frontend. See WordPress's export documentation.
Static Plugin: Generate HTML from the Admin Panel
If you have WordPress admin access, Simply Static offers free static generation with ZIP or local-directory output. Keep WordPress as the editor, generate the static version, and upload it to your host. Check the plugin's current requirements and paid deployment features before choosing your workflow.
NoCodeExport: Export from a Published URL
Use the WordPress to HTML converter when you want to export a public site you own or have permission to copy without installing a plugin or using wp-admin:
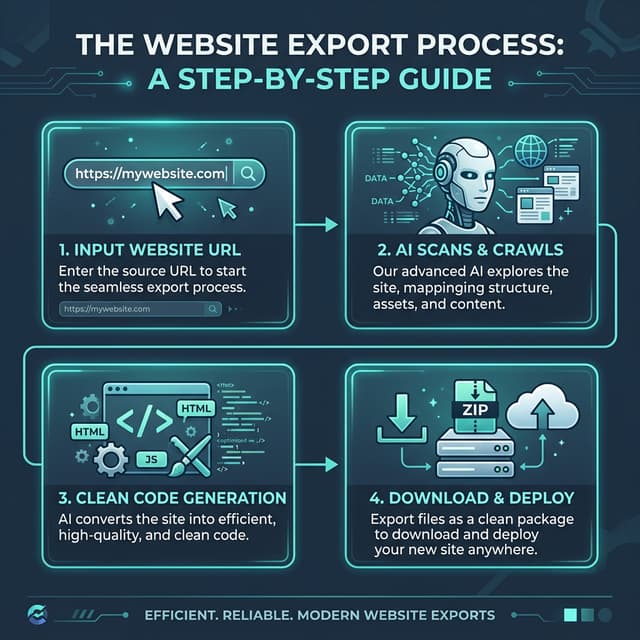
- Paste the published WordPress URL into the converter.
- Scan the site and review the detected pages and features.
- Select the pages and export options available to your plan.
- Download the ZIP and compare its contents with your URL inventory.
- Serve the files on a test host; check desktop and mobile layouts, navigation, fonts, images, and interactions.
- Resolve missing resources and dynamic features before publishing.
The Free plan includes 10 single-page exports per month, with assets linked to their remote sources. Full-site exports and local asset downloads require an eligible paid option and remain subject to page and crawl limits. Check current plans and limits before exporting a larger site.
The ZIP contains a snapshot of the rendered public frontend within the selected scope. It is not a WordPress backup: it does not include the database, PHP, editable theme source, plugins, or server-side services. Keep a separate WordPress backup if you need to restore the original installation.
Even with local asset downloads, blocked resources, embeds, and remote services can remain external. Test those dependencies before switching off the original host. Theme compatibility and visual fidelity need checking on your actual pages.
Step 3: Handle Forms and Dynamic Elements
Static sites cannot process form submissions on their own. Replace WordPress form plugins with static-compatible alternatives:
- Formspree -- receives form submissions via a simple action URL
- Netlify Forms -- built-in form handling if you deploy to Netlify
- NoCodeExport Hosted Forms -- configure supported forms and verify delivery to the intended recipient
- Custom API -- point forms at your own serverless function or backend endpoint
If your export includes a client-side search index, test it against the exported pages. It does not migrate WordPress database queries, live filters, or private content. Otherwise, add a static-compatible search service or remove the inactive search interface.
For comments, consider Disqus, Utterances (GitHub-based), or simply removing the comment section if it is no longer active.
Step 4: Set Up the Static Hosting
Choose a static host that supports your paths, redirects, and required integrations. Common deployment options include:
| Provider | Deploy Method | Check Before Moving |
|---|---|---|
| Netlify | File upload or Git | Redirect rules and form configuration |
| Vercel | Git or CLI | Routing and plan suitability for the project |
| GitHub Pages | Repository publishing | Path handling and redirect limitations |
| Cloudflare Pages | Git or direct upload | Redirect rules and deployment limits |
Check each provider's current pricing, usage allowances, commercial-use terms, HTTPS setup, and integration costs. A free hosting tier does not guarantee that every site or feature can run at no cost.
SEO Migration Checklist
Use this checklist to reduce migration errors. Keeping URLs and metadata consistent helps search engines understand the move, but it does not guarantee unchanged rankings.
Before Deployment
- Document every URL on your current WordPress site
- Verify that the exported HTML files use the same URL paths
- Confirm that title tags and meta descriptions are present in each exported page
- Check that Open Graph tags and structured data (JSON-LD) are preserved
- Prepare redirect rules in your host's supported format for any URLs that must change
After Deployment
- Set up 301 redirects for changed URLs on your hosting provider
- Resubmit your sitemap to Google Search Console
- Verify that canonical tags point to the intended production URLs, whether the domain changes or stays the same
- Run a site-wide link check to catch broken internal and external links
- Monitor Google Search Console daily for the first two weeks
Where included in your export option, NoCodeExport's SEO audit can flag issues during the export process. Use it as a starting point, then manually verify the items above.
If you are interested in how HTML extraction works across different platforms, our guide on copying HTML code from a website provides additional context.
Link Redirects and Monitoring
Redirect Strategy
WordPress sites often have URL patterns that differ from static file paths. Common cases:
- Trailing slashes. WordPress uses
/about/while static files may be/about.htmlor/about/index.html. Configure your hosting to handle both. - Pagination. Blog archive pages like
/blog/page/2/need to be exported as individual pages or consolidated. - Category and tag pages. These are dynamically generated in WordPress. If they carry SEO value, include them in your export.
- Query parameters. WordPress uses
?p=123for some internal links. These should resolve to clean paths after conversion.
Monitoring After Launch
- Google Search Console. Review page indexing and inspect important URLs. Investigate unexpected 404s, redirect errors, blocked crawling, and incorrect canonical selection.
- Analytics comparison. Compare organic clicks and conversions over comparable periods. If performance drops, investigate crawl access, redirects, content changes, and seasonality; there is no fixed ranking-recovery window.
- Rank tracking. Monitor your top 10 to 20 keywords. If any drop significantly, verify that the corresponding pages are accessible and that redirects are working.
Updating Content on a Static Site
The main tradeoff of going static is losing the WordPress admin panel for content editing. Here are your options for ongoing updates:
- Re-export. If you still maintain the WordPress installation, make changes there and re-run the export. This is the simplest approach for infrequent updates.
- Edit HTML directly. For small text changes, edit the HTML files directly. This requires basic HTML knowledge.
- Use a static site generator. Migrate your content to a Markdown-based system (Astro, Hugo, Eleventy) for a CMS-like workflow without the overhead of WordPress.
- Headless CMS. Use a service like Sanity, Contentful, or Strapi to manage content, then build static pages from the CMS data.
Performance Results
Measure the original WordPress page and the exported site under the same conditions. Compare Core Web Vitals, transfer size, JavaScript work, external requests, and functionality. A static frontend removes the public WordPress runtime, but forms, dependencies, deployment access, and the selected host still require maintenance and may carry costs.
If you need the reverse workflow — importing HTML back into WordPress with a page builder — see our HTML to Elementor converter guide.
Ready to Convert?
Converting WordPress to static HTML can be a useful option for a stable website when the measured result and maintenance tradeoffs fit the project.
Scan your WordPress site and review the export options. Start with a single-page export, test the result, and choose a wider export scope if it fits your migration.