
Yes, a published Framer site can be moved to another host. Framer's data-portability documentation, checked September 7, 2026, describes downloading published HTML, CSS, JavaScript and assets. CMS data has a separate CSV or JSON export path through plugins.
A Framer to HTML exporter provides a URL-based workflow for selecting public pages and packaging the result. This captures the published frontend; it does not recreate an editable Framer project. Check the generated files and any external services before deploying them.
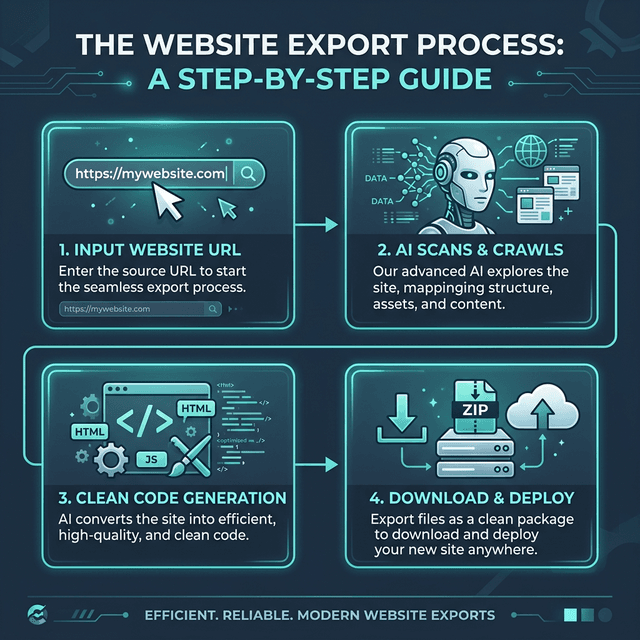
If you already have a live Framer URL, you can start with the Framer export tool and come back to this walkthrough while the scan runs. If you want to move from Framer to HTML efficiently, this walkthrough covers everything you need to know before you commit to a manual rebuild.
Ready to export? Paste your Framer URL into the Framer to HTML converter, then review the generated ZIP before deployment. Completion time varies with page count, assets, third-party responses, and site behavior.
Why teams export from Framer
Framer is excellent for design and publishing speed, but teams usually look for export when one of these business or technical needs appears:
- Hosting independence so the finished site can live on Netlify, Vercel, Cloudflare Pages, S3, or internal infrastructure.
- Code ownership when a developer needs files they can audit, version, edit, and deploy without platform lock-in.
- Cost control when a site no longer needs to stay inside a paid Framer workflow just to remain online.
- Performance tuning when you want to add your own asset pipeline, analytics setup, redirect logic, or caching rules.
- Migration planning when the exported site becomes a bridge to a deeper rebuild in Next.js, Astro, or another framework.
In practice, Framer export is usually less about "getting source code" and more about creating a reliable, deployable snapshot of the live site.
What a Framer export actually includes
With a live-site exporter like NoCodeExport, the output is based on the rendered frontend visitors already see. That usually means the ZIP includes:
- HTML files for each crawled page
- CSS and JavaScript needed for the rendered experience
- Relative internal links so the site works after deployment
- Images, fonts, and other assets depending on your selected plan
- Preserved metadata such as title tags, descriptions, canonical tags, and Open Graph tags
- Form handling configuration if you choose a supported backend
This is different from trying to reverse-engineer a Framer project file. The goal is not to reproduce Framer's editor internals. The goal is to produce a clean website package you can host anywhere.
Framer portability and a URL-based export
| Need | Framer's documented options | NoCodeExport workflow |
|---|---|---|
| Published site files | Downloadable output for another host | A ZIP of selected public pages |
| CMS content | Separate CSV or JSON export through plugins | Published content captured as static pages |
| Asset handling | Check downloaded files and dependencies | Source-linked on Free; downloading available for paid exports |
| Forms and dynamic services | Configure and test on the destination | Choose supported form handling; test other services separately |
| Developer handoff | Published output differs from editable project source | Inspectable static files, not generated React component source |
Choose the workflow that fits the files you need. Use the Framer to HTML converter if you want page selection and export configuration from a public URL.
Step-by-step Framer export workflow
1. Publish the site first
You need a public URL for the exporter to crawl. In most cases that means:
- Publish the site to a Framer domain or your custom domain
- Open the live site in an incognito window
- Click through the key pages to confirm nothing is blocked behind auth
- Copy the URL you want to export
If the site is still unfinished, publish a review build first. Export works best from the real, rendered production-like version.
2. Decide whether you need a single page or full site export
Before you run the export, decide what job the ZIP needs to do:
- Single page export is best for landing pages, one-page campaigns, and quick design handoff
- Full site export is better for marketing sites, CMS-driven brochure sites, and migration projects
If you are unsure, choose full site export so navigation, metadata, and internal links can be checked in one pass.
3. Paste the Framer URL into NoCodeExport
Go to NoCodeExport, paste the URL, and let the scan identify:
- platform type
- page count
- visible assets
- forms
- rough export scope
This scan is useful even before you buy anything because it tells you whether the site is simple, medium, or likely to need a full rebuild instead of a static export.
4. Configure export options
The main decisions at export time are usually:
- Single page vs full site
- Form handling
- SEO audit
- Asset strategy
- Optimization / minification
If the site contains lead capture forms, do not skip the form decision. Framer-style frontends often look complete while the submission backend still needs replacement after export.
5. Run the export and review the ZIP
Export time varies with page count, asset volume, third-party response times, and site behavior, so there is no dependable fixed completion-time promise. Once the ZIP is ready:
- Download it
- Open the files locally with a lightweight server
- Click through every key page
- Test forms and navigation
- Check page source for SEO metadata
If the site is important to revenue, treat this like release QA, not just a visual spot check.
What to check in the exported design
Compare these elements with the original site:
- page structure and layout
- typography and spacing
- responsive breakpoints
- images and background media
- hover states and many CSS-driven effects
- scroll-reveal style motion
- metadata in the document head
A static export can be useful for brochure sites, portfolios, launch pages and SEO landing pages when these checks pass.
What needs extra attention after export
These are the areas you should verify carefully:
Forms
Framer forms still need a backend after export. If you do nothing, the form may look fine but not submit anywhere useful. A safe setup is:
- hosted forms if you want the simplest path
- Formspree if you already use it
- Netlify Forms if Netlify is your target host
- your own API if the project already has backend infrastructure
Complex motion and app-like behavior
Very custom stateful interactions can require review. If the Framer site behaves more like a web app than a content site, static export may not be the final answer. In those cases, the better path is often a Next.js rebuild.
Third-party scripts
You should decide which scripts to keep and which to re-add after deployment. Analytics, chat widgets, and tag managers are best reviewed manually so you do not carry over unnecessary bloat.
Asset strategy
On the free plan, large assets may remain hotlinked from the original CDN. On paid plans, asset download options can give you a more self-contained package. Your decision depends on whether you care more about zero-cost hosting or full ownership of media files.
How to keep SEO intact after exporting from Framer
Changing files, URLs or hosting can affect search performance. Check the exported metadata and the destination configuration before launch.
Check these SEO elements after download
- title tags
- meta descriptions
- canonical tags
- Open Graph tags
- Twitter cards
- headings
- internal links
- sitemap and robots behavior on the new host
NoCodeExport includes a built-in SEO audit to help catch missing tags and other technical issues before you launch.
Keep the same URL structure if possible
If the old site had pages like:
//pricing/about/case-study/foo
keep the same paths on the new host whenever possible. Stable URLs reduce redirect work and make the migration cleaner for search engines.
Add redirects if URLs must change
If any path changes, set up 301 redirects before launch. This matters most for:
- blog posts
- pricing or feature pages
- pages with backlinks
- pages already ranking in Google
Resubmit your sitemap
After deployment:
- verify the new sitemap is reachable
- submit it in Google Search Console
- monitor crawl errors for the next two weeks
That simple post-launch routine catches most migration SEO issues early.
Best hosting options for exported Framer sites
Once you have the files, hosting is straightforward.
| Host | Best for | Why teams choose it |
|---|---|---|
| Netlify | Fastest non-technical deployment | Drag-and-drop, forms support, previews |
| Vercel | Strong performance defaults | Great DX, simple deploy pipeline |
| GitHub Pages | Version-controlled static hosting | Good for developers and internal projects |
| Cloudflare Pages | Edge delivery and bandwidth | Excellent global performance |
| S3 or custom infra | Full ops control | Best for teams with existing infrastructure |
If this is your first time deploying static files, the easiest route is usually Netlify. We also have a separate guide on how to host a Framer site on Netlify.
Is There a Framer React Export Plugin?
A common search is for a Framer React export plugin — something that turns a Framer site into React components. There is no official plugin that does this. Framer sites run on React under the hood, but the platform does not expose the generated component code for published sites.
In practice you have three paths:
- Code components you wrote can be copied out of Framer directly — they are plain React files.
- The published site can be exported as static HTML, CSS, and JS with the Framer to HTML converter — test animations and layout before deployment.
- A maintainable React codebase is a rebuild job: our Next.js rebuild service converts the exported site into clean React/Next.js components.
For most teams the static export covers hosting freedom immediately, and the rebuild path exists when you need the site as real React code.
Framer export vs rebuilding from scratch
Export is usually best when:
- the site is mostly marketing content
- the existing design should stay the same
- timelines are short
- you want a clean handoff fast
Rebuilding is usually best when:
- the site needs dynamic authenticated features
- interactions depend heavily on custom state
- the team wants a maintainable React or Next.js codebase
- content, IA, or architecture will change significantly anyway
If you are deciding between the two, read the full Framer export vs rebuilding comparison. If the project already feels too complex for static output, skip straight to the Next.js rebuild service. If export is still the better fit, the Framer export tool lets you start with the published URL.
Framer export QA checklist
Use this before you call the migration done:
- Every page loads on desktop and mobile
- Navigation links resolve correctly
- Forms submit to the selected backend
- All images and fonts load correctly
- Meta title and description appear in source
- Canonical URLs are correct
- Social preview tags are present
- Any analytics scripts are intentionally re-added
- Redirects are configured if URLs changed
- The new sitemap is submitted to Search Console
This checklist is boring, but it is what protects rankings and conversion paths after launch.
Related guides
- Move from Framer to HTML for a broader migration checklist
- How to get code from Framer for every practical extraction method
- Framer export vs rebuilding for deciding when export is not enough
- Top free hosting options if you want the lowest-cost deploy path
- Best no-code export tools for comparing the market
- Website export reliability benchmark methodology for the prospective measurement protocol; no results are published yet
Final takeaway
The best Framer export workflow is simple:
- publish the real site
- export from the live URL
- test the ZIP carefully
- deploy on your own stack
- protect SEO during launch
That gives you the speed of Framer and the control of traditional hosting, without rebuilding the site from scratch unless you actually need to.
Ready to start? Try NoCodeExport for free or see pricing if you need larger exports, offline assets, SEO audits, or deployment helpers.